
MRA Expressway | Wireless Phone | VPN Phone
Mobile and Remote Access Expressway (MRA)
-
Requirements:
-
Compatible Phone Models: 7811, 7821, 7841, 7861, 8811, 8841, 8845, 8861, 8865, 7832, 8832
-
POE or power brick and power cord
-
- Setup:
1. Take the phone home and then connect the phone to the user's home network
2. Power on the phone and while its booting up Change Service Mode, press the select button (circle in the navigation pad). If its not selected during the boot up process you can return to Change Service Mode Screen: Click on Settings > Admin Settings > Reset Settings > Service Mode > Reset or by power cycling the phone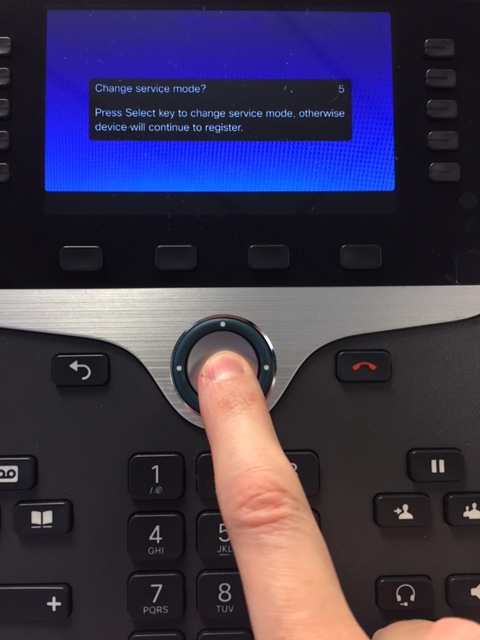
3. Enter the service domain, will be provided or Email care for assistance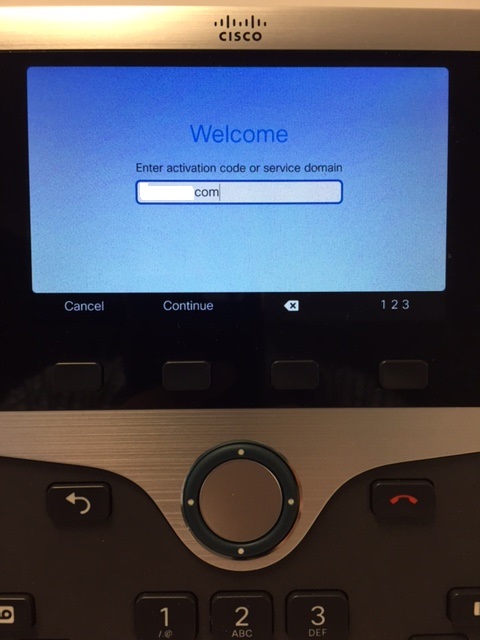
4. Enter the 11 digit user ID and password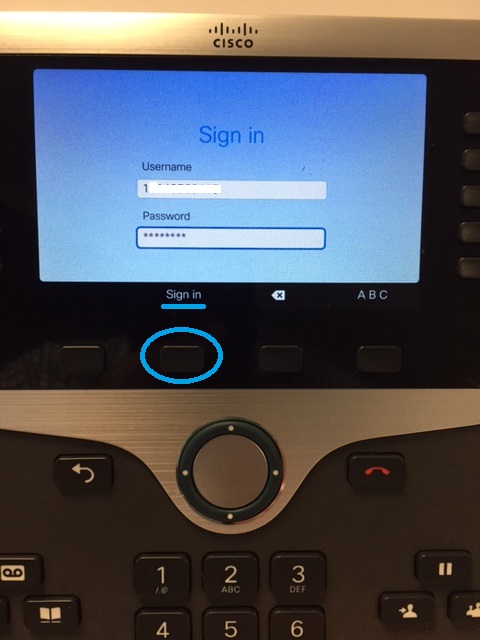
5. Press Sign In, shows Connected
Wireless Phone


The Cisco Unified Wireless IP Phone 7925G (left) and 7925G-EX (right) provides:
- Support for Bluetooth v2.0
- Hermetically sealed phone/display is IP54 rated, protects against dust, liquids, and moist wipes, and is ideal for deployment in more demanding environments
- Ruggedized industrial design, compliant with military 810F standard and includes a rubber casing to shield the phone from damage caused by drops and shocks (EX only on right)
- An easy-to-hold compact design
How to do Intercom Calls
| Place an intercom call to any intercom number |
Important: Recipients of IC calls will automatically be placed in mute mode. |
| Receive an intercom call | When you hear the intercom-alert tone, handle the call in one of these ways:
|

 .
. to activate the intercom line
How to do Conference Calls
| Create a conference |
|
| Receive an intercom call | Repeat the steps listed above. Your system administrator determines whether participants in a conference can add or remove other participants. |
| See a list of conference participants or remove participants | Choose Options > ConfList. See Viewing or Removing Conference Participantsbelow. |
| End your participation in a conference | Choose EndCall or Options > EndCall. |
Viewing or Removing Conference Participants
During a standard (ad hoc) conference, you can view a list of participants and remove participants.
If you want to… Then…| View a list of conference participants or remove participants |
|
| Get an updated list of participants | While viewing the conference list, choose Options > Update. |
| See who initiated the conference | While viewing the conference list, locate the participant listed at the bottom of the list with an asterisk (*) next to the name. |
| Remove any conference participant | While viewing the conference list, highlight the participant's name and chooseOptions > Remove. You can remove participants only if you initiated the conference. |
| Drop the last participant added to the conference | While viewing the conference list, highlight the participant's name and chooseOptions > RmLstC. You can remove participants only if you initiated the conference call. |
| Verify that a conference call is secure | Look for the   |
| Verify that a participant is calling from a secure phone | Look for the |
| End your participation in a conference | Choose  |

VPN Phone Login
1. Register phone at work first, and then take home to connect the phone to the user's home network
2. On the phone, select applications (gear button) > then select VPN
3. In the VPN Enabled pane, select On
4. Enter the user ID and password
5. Press Sign In, VPN Status shows Connected (allow several minutes to register)
NOTE: To view and change VPN settings, press Applications on the phone
User ID and password is provided by request, Submit a request
Softphone
Cisco IP Softphone is a Windows-based application for the PC. Email care and we will respond by sending a link containing the file for Cisco IP Communicator to download and install the Cisco IP Softphone. Window 10 user: run .exe by right clicking and running in compatibility mode for Windows 7. Launches normal post install
After installation is complete:
1. Open the Cisco IP Communicator and select the square icon in the left of the upper right hand corner on the virtual phone
2. Click on Preferences and the click on the 2nd tab Network
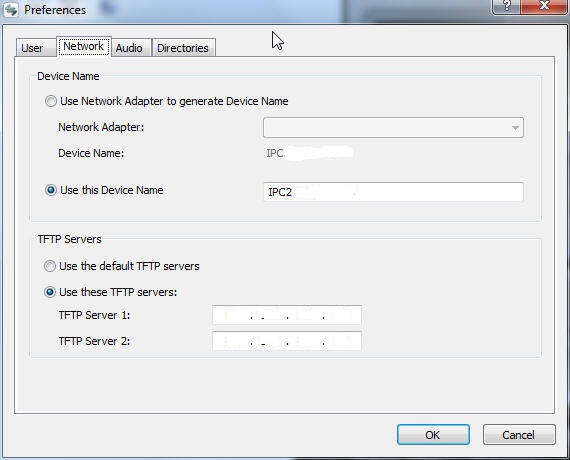
3. Use this Device Name: Enter MAC Address
4. TFTP Servers: Enter alternate TFTP addresses
5. Next a restart should occur and a CIPCLocaleDownloader will open
6. Phone should open back up again with Updating Locale and Reset and give it several minutes to finally register.
NOTE: The Personal Number will appear in the top right and the time in the top left. Video currently is not supported on this software version
current version is not compatible with Windows 10, use Windows 7, right click on CIPC and go to properties, select Compatibility tab and use Win 7
Comments
0 comments
Please sign in to leave a comment.